One of the little upgrades we did during our cabinet makeover was add faux feet. We added the beautiful new header and crown molding as well as some extra trim, and the bottoms were needing something to dress them up. My mother-in-law has done this to her cabinets before, usually adding bun feet, but after searching high and low for feet that would fit under my cabinets without having to make some serious modifications I came up empty-handed. Then (too quickly) came the day we were scrambling to get everything ready for the painter (who was coming early the next morning), so I was out of time and options. Time to get creative!
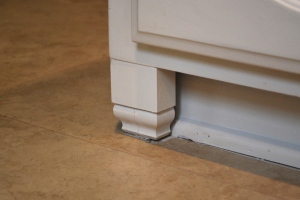
We strolled up and down the aisles at our local Home Depot, and I kept coming back to these little base molding pieces. They were $1.38 apiece, nice price since some feet were upwards of $10-12 each, and I wanted to put a lot on. That and the more expensive ones didn’t fit anyway. I knew there was a way we could make these $1.38 babies work! After some trial-and-error, here’s what I came up with
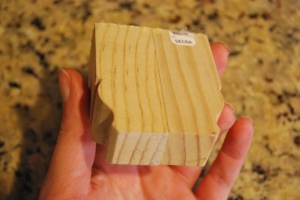
This ended up being a great solution, because it fit snugly under the cabinets (after being cut to the right height) and the depth was perfect. We didn’t have to mess with the existing quarter-round moldings that were at the base of the cabinets and the floor. Considering how little time we had to work with, that was pretty much a disaster averted!!
I won’t lie, cutting these to the proper height wasn’t easy or quick, since our floors and/or cabinet bases are all different heights. Sure, they look the same, but looks can be deceiving. My sweet husband made many trips back and forth adjusting the height by only taking off “a hair” at a time until each one fit it’s specific place in the kitchen.
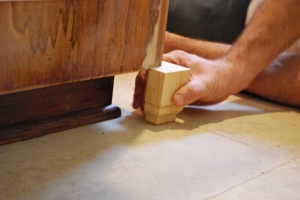
Here’s what installation looked like (pre-paint, obviously):
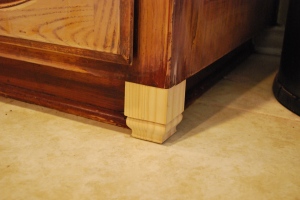
Next came figuring out the corners. I put three pieces together to wrap the corners:
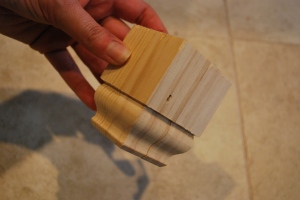
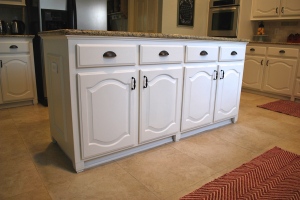
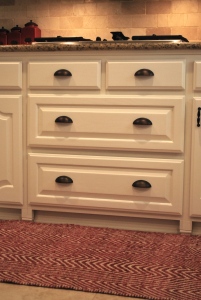
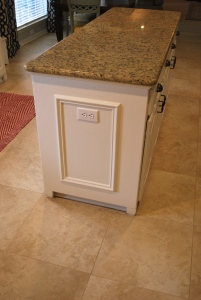
Since we had plenty of pieces, we decided to go all-out with the feet, putting them pretty much everywhere. I’m happy we did, they give the cabinets a more custom furniture feel. After they were installed I filled all the holes and cracks in preparation for the coats of paint they were about to get. A little tedious, yes…but now that they are done they look nice and it was worth it!
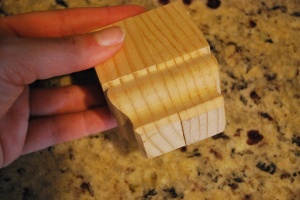
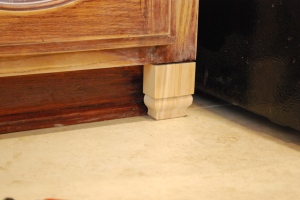
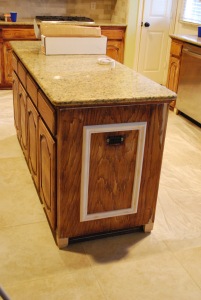
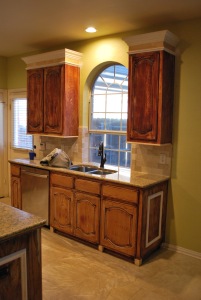
Here are some post-paint pictures: (much prettier)
So there you have it! Faux feet from cheap molding pieces. I actually had fun problem-solving a bit with this one. What creative solutions have you found for your DIY projects? Post in comments – I’d love to hear!
Love this idea! I’m redecorating the kitchen. No new cabinets they are still nice. But new tile countertops and backsplash. Building a butlers pantry where a closet is(using a China hutch hanging the upper part and creating more counter top space and storage with the bottom of the hutch. I just thought tonight how I’d like bun feet on the new hutch and the cabinets. Your idea is the best I’ve seen! I like the simple lines, round wouldn’t look good with my beadboard cabinets. I was just at Home Depot today, wish I’d seen your blog earlier! I will let you know if I do it too!
LikeLike
Thanks Michelle! Please send a picture when your project is done-I’d love to see it!
LikeLike
I bought 8 of the molding pieces today. I need 4 to make one leg for my island as the recess is deep. They are too tall for my regular cabinets, so we have to cut off an inch before I can tell how it will look. But I only need two for those cabinets. I’m excited to see how it will look!
LikeLike
We had to cut the molding pieces down quite a bit too. It was trial and error since none of our cabinet bases seem to be the same height. Hope it works for you, we are very happy with ours!
LikeLike
I bought enough for 8 sets of feet. Hubby is gluing them today, slow as he just has two clamps! Tomorrow we can start cutting and then I can paint them! I can’t wait! I’m busy painting the China hutch that will become a butlers pantry in the kitchen closet space as well.
LikeLike
Good for you! I don’t think we glued them, my husband shot a couple nails through to hold them together. I caulked the seams before painting them. I think gluing them will be worth the time and effort, probably cleaner seams when it’s all done! Can’t wait to see your project!
LikeLike
how can I post a picture of my finished feet?
LikeLike
You could try posting or messaging a pic on my Beautiful Branches Facebook page. I’m not near a computer at the moment or I would try to figure it out! There is a link to my BB Facebook page on the main page of the blog. I am excited to see what you did!
LikeLike
Hi Michelle, I added a contact page on the site, so you can try contacting me that way. Thanks for your patience, can’t wait to see what you’ve done!
LikeLike